Showing posts with label saving money. Show all posts

Monday, October 1

Felt Board Fun: Colorful Ice Cream Board!

Anyone else remember the days of felt boards in Sunday School or at preschool? Little shapes, people, animals, buildings, ANYTHING cut out of felt, that the teacher moved around the board (usually a big piece of cardboard covered in heavier felt) to "act out" the story being told, or help with counting, colors, alphabet... The possibilities were endless.
Felt boards are fun and definitely bring feelings of nostalgia, but I thought they were becoming a forgotten thing. Well, it turns out that felt boards are alive and well - in preschools still, according to my mom (preschool teacher extraordinaire) and also according to the mass of "DIY felt board" Pinterest search results I got when I did a search. I love it!

Why are you talking about felt, you ask? Well last weekend, our favorite two year old had her birthday party. Hubs and I have been on a serious budget the past few months (is spending practically NOTHING even called a budget?), but I didn't want that to keep us from bringing a gift with meaning and thought put into it. I decided I wanted to make something, because it would not only save money but allow more creativity and fun than purchasing a gift.
Then an instance of perfect timing - serendipity, even, - took place. Lindsay over at The Little Red Horse posted about an ice cream-color matching felt board that she made. She had been inspired by an original ice cream-color matching felt game over at Mama Papa Bubba.

I took one look at these adorable games and said, "I can do that, and it will be a perfect gift!" So off to JoAnn Fabric I went.

  • I picked out a bunch of the basic 34 cent felt rectangles in varying bright colors and a tan that looked like the color of ice cream cones, and used the "Coupon Commotion" ad to get 50% off almost every piece of felt.
  • Then I went over to the bulk fabric and picked out the bolt of cream-colored 72" felt for the board part. I cut a piece to fit a 16" by 24" poster frame.
  • I also had to buy a new bottle of Tacky Glue. Another 50% off coupon there ;)
  • I used a coupon at Michael's craft store to get a 16" x 24" poster frame, with acrylic instead of glass (kid safe!), and an elegant brushed nickel colored frame edge.
  • I traced the shapes (ice cream, cones, and dots) according to the template over at Early Learning Activities, with a fine tip Sharpie black pen. Then cut them out with basic scissors - didn't want to risk dulling my sewing scissors with felt.
  • I glued the dots onto the cones with Tacky Glue, and let them dry for over 24 hours.
  • I used pre-made/pre-cut pink felt letters with sticky backs to spell her name. I found the felt stickers on clearance at Michael's. I stuck them to little squares cut out of the ice cream cone-colored felt.
  • I took the acrylic window piece out of the frame, wrapped the (already cut) cream-colored felt piece around it, and taped in the back with clear packing tape. It fit so nicely back into the frame, and was smooth on the front because the bolt felt did not have fold lines (bonus!).
  • It cost less than $20 for everything, and about three hours time investment, including shopping and "work." It wasn't work though, it was so much fun to be making something and being crafty again! I've missed that.


Here it is!
(Terrible photo quality, I know)

It was 2 in the morning, so I wasn't so concerned with good lighting ;)

With this, Miss Phillipa can learn not just colors, but also the letters in her name...


Making and giving this gift was so much fun. It was a hit with the birthday girl, her parents, and the other guests at the party. It feels great to make something that will be used and loved, and at the same time inspires other people to be creative and crafty, and learn with their children.

I can't wait to make some more cute felt creations to go along with Victory's favorite books - The Very Hungry Caterpillar and Ten Little Ladybugs have great felt-board potential :)

Tuesday, August 21

Summer Update

So, I've been neglecting the blog lately, because summer in the Pacific Northwest is the most glorious time and place on earth! We have been extra blessed this summer to have sunny weather and temperatures in the 80's more days now than I can count. We had a real heat wave last week and it nearly hit 100! Can I just say, God bless the brilliant individual that invented Air Conditioning? ;)

This will be an update brought to you by a bunch of photos; a little sneak peek into some of our summer activities and accomplishments.

1) To start off, I don't have a photo for this, but by far the biggest accomplishment around our home is that we now have a TODDLER! And she is just eight days away from turning one years old! Time flies far too fast as a mom, but how incredibly wonderful the time has been! :)

2) Bargain treasure hunting...

I have totally scored this summer when it comes to secondhand and clearance rack bargains! I've been frequenting the thrift stores when us gals need to get out of the house for a bit, and we've found some great things. A few of them that I can remember right now:

  • A huge bag of Mega Bloks for a buck - I soaked them in warm water and bleach in the sink, ran them through the dishwasher, and they are good as new!
  • A bunch of items - some thrifted, some clearance at JoAnn Fabrics and Michael's stores - for Victory's garden birthday party. I am SO excited to decorate with all the goodies I've been stashing away. More photos of those to come, after the party.
  • My best find, I think, was a "garden arch" - really a simple arbor - which is something I've been wanting all summer. I found one in a box on the bottom shelf at Goodwill over the weekend - for eight bucks!!! Hubs and I put it together and it is in our yard awaiting the party. I am always reminded of how God cares even for our little wish lists, because it's so evident when I find treasures like that!
  • Perhaps my most unique find was this totally awesome retro clock. It was 3.99, and I had a $3 off $10 purchase coupon for making a donation to the store, so since I spent $10 on more "necessary" items, I consider this a freebie! ;)


Another great score was ten organic herb plants from Home Depot, on clearance for 75 cents a pot! One of the lavender plants fit perfectly into this hand painted clay pot - also from the thrift store, for $1!
(From the way I describe it, you'd think I go shopping every day. Actually, I've only been to the store about ten times this whole summer!)

3) Gardening

It is official. I have caught the gardening bug!


Hubs and I have said for four years that we wanted to garden, but we were always so busy throughout the past four years in our home remodeling moldy walls and fixing rotten floors... well this year we finally followed through! Hubs was given free wood at work, as well as our neighbor gave us a bunch of wood. My amazing handy man built six raised beds for me, and I went to town! (I have definitely caught the 'gardening bug!')

This is my cart after discovering the clearance and end-of-season mark down racks at Home Depot...

Some early goodies from my winter squash vines, and a zucchini we let go too long!

We are growing many different things. Lettuce - red leaf and butter; Brussels sprouts; broccoli; zucchini; tomatoes (three types - Roma, Early Girl and Big Beef); three types of peppers - Jalapeno, Green bell, and orange bell... oh I can't even remember everything. All that matters is that everything is thriving and we have or are going to have tons of produce to enjoy and give away!


I found some great pots on clearance at Rite Aid last month, and filled them with flowers. This is my hardy Gerbera daisy from last spring - remember when I bought it? I never covered it with mulch for the winter, and I thought the late ice storm we had surely killed it. But it returned!

Tip from a Home Depot nursery employee: plant marigolds in the corners of your raised beds, and the slugs will go munch on those and leave your veggies alone.

Here is our first red tomato - a "big beef ." And there are about thirty green ones, plus all the tomatoes on the Roma and Early Girl plants. Yikes, I wish I could have nightshades! Fresh salsa from your own tomatoes must taste amazing!
Our neighbors will be benefiting from our surplus :)

Can you see the teeny tiny sprouts in the base of each leaf? The cabbage moths have been loving the leaves but I'm hoping we still get a good crop in the fall. We LOVE our Brussels sprouts around here!

I just love this plant, called "Mossflower." I don't know of any other flower plants that have multiple colored blooms on the same plant! It's amazing! I bought four or five of them, because they were so pretty and I could tell they had potential. Well they did, they have grown twice their size in just a few weeks, and hang over their baskets beautifully!

Pink and green zinnias, cream colored Marigolds...

More Zinnias and Marigolds 
Butter lettuce! We've been snipping off leaves for two months to eat, and it just keeps coming back. Awesome!

I couldn't resist this Dahlia plant when it was on sale for $5 - and now it is HUGE!  Dahlia  flowers are just beautiful

4) Crafty stuff!
I made this for the Fourth of July. It was fun, I sat down with fabric scissors, three quilting fat quarters (red, white, and blue patterns) and a wicker wreath from the dollar store. One movie later, I had a wreath. It felt a bit sparse to me, and I had a lot of leftover fabric strips, so I got another, smaller wreath and tied fabric to that one and connected the two wreaths together with twine. Super easy and cheap to make, and you can do these in any color for any occasion!
Original inspiration from Woman's Day magazine

I've also been using my crafty skills to do a lot of things for Victory's upcoming birthday party...


 6) Birthday party planning!

Hubs and I talked for a few months about our sweet girl's first birthday party. We finally decided on having it at home and making it a "garden party," because this has been our year to finally start investing time and resources into our yard. So why not host a celebration there and really enjoy it! I also like that the money we've spent on potted plants, flowers and garden beds and windchimes and more, is not 'birthday themed,' but they will be party decorations and then just staples in our yard each summer. Double purpose but only a one-time purchase - it's a win-win!

This is a bean bag toss target that a friend and I painted. It is two pieces of foam core board from the dollar store, staple-gun stapled to a wooden frame that used to be part of a shelf in our bathroom.
At the bottom of the photo are bean bags I sewed from leftover nursery fabric. Easy tutorial found here

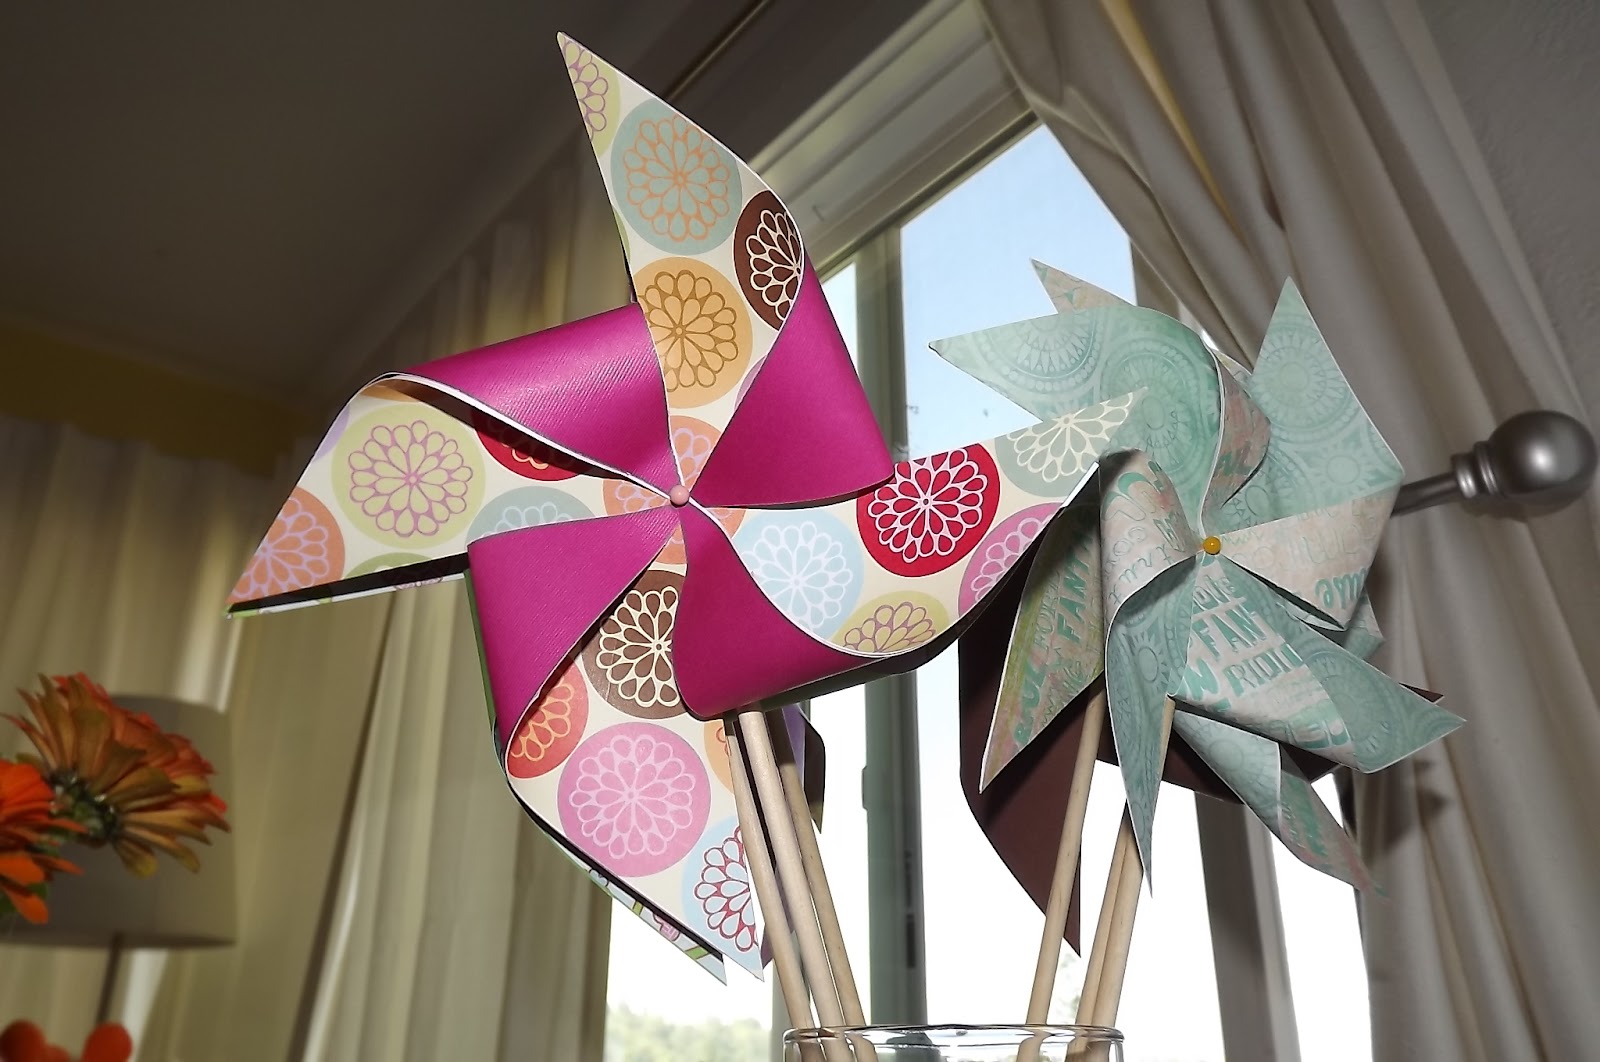
Pinwheels! I was inspired earlier this summer by a Martha Stewart craft tutorial, and then this garden party blog post, so I have been making them in my free evening time. I've got some little ones, and some huge ones!

8) Home improvements, in particular:

Finishing the bathroom remodel we started in May 2011!

Just a snapshot of the prettiest part of our new bathroom - mosiac glass tile. It cost just $14 total!
Right under that is a wall-mount sink from IKEA. Cost? Just 30 bucks!
Hubs has done an amazing job. It has taken much longer than we'd have liked, but we are so close to being done (just cosmetic stuff left - drywall sanding, painting, staining trim). Can I just say, my husband is amazing! He is working so hard and has so much on his plate, and never complains! Thank you for your great attitude and leadership, Babe!

Hubs has also been very busy building a deck around our house, so our little champ can play outside even when the lawn is sopping wet this winter! It is taking shape and I am so excited to get out there and start decorating it with thrifted, made-over outdoor furniture and accessories!


...Well, that's a little bit of what we've been up to. The highlights! What special things have you done this summer??

Wednesday, May 2

The New JC Penney, and A New Dress

This post has nothing to do with Paleo, gluten-free, or food at all. Because I am a multi-dimensional person with a life outside of the kitchen ;)

Yesterday was a doozy of a day. My baby girl was almost injured very seriously. Thank You Jesus again, and again, and again that she is fine. It really shook me up. THEN, the toilet flooded, and the water just kept flowing, and flowing... It was horrible to just stand there and watch it flow out of the bathroom, down the hall, and I couldn't get it to stop! Thank you, my amazing husband for coming to the rescue. 
The water could've ruined our one-year-old hardwood flooring, but it didn't. Serendipitously, our linens are right next to the bathroom and I threw down every bath towel I could find to soak it up. I have the last batch of towels drying in the dryer now - four loads of laundry later!
Hubs removed the sink, toilet, and floor from the bathroom and laid down new subflooring and toilet. If you remember, last year when we started the baby bedroom remodel we found that our bathroom needs redoing too. It's been a year of putting it off and boxes of ceramic tile sitting in the house getting tripped on... Well sometimes you need a push to get moving on a project, and life gives you that push. Like a toilet clogging ;)

But, the day wasn't all bad. In between the two events, I drove my girl and myself to the mall and we did some stroller time browsing and checking out spring fashions. It was fun! We spent most of our time at one particular store... Have you guys been to the "new" J C Penney yet? I went for the first time yesterday, and it did NOT disappoint! I have been wanting to go since they announced their big changes a few months back, when Ellen (Love her!) became a spokeswoman and did those great Superbowl commercials set in the old West and Victorian times. Some of JCP's new promises include "Fair and Square Pricing" - no more confusing sales or x.99 prices. They have simple, easy to read red, white and blue colored tags, with great prices every day, plus monthly specials, and markdowns on the first and third Friday of each month. They promise "Happy Returns" on anything, anytime, with or without a receipt. I heard that they are working to bring jobs back to the USA. I guess someone had an "aha moment" and got passionate about returning to the company's roots. Pretty cool!
...Listen to me, I sound like another JCP spokeswoman. I'm not, but I am excited about their changes! So, go JC Penney! Thank you for supporting some of the good American traditions and reclaiming and improving upon your heritage!

I think the best part of the new JCP -you may have noticed this if you have cable and see the entertaining colorful TV commercials- is that every month they have a theme. Some of the red tagged "everyday prices" go lower for the month, the store decor changes, the doors and signs are decorated. For example, this month the color theme is pale purple and says, "it's Mother's May." It's fun :)

It was great fun looking around yesterday. There are some new designers, fantastic prices, and the quality of the clothing seems very good. I think with myself and my peers, since we were preteens we've classified JCP as our mothers' and grandmothers' store; not exciting or sophisticated stuff. But they have transformed! I noticed that they've got modern styles for every brand and age. I wanted to try something on at every turn, and was mentally picking things out for my mom and great aunt... So, you go JCP-loving Grandmas! :)

When I saw this dress I fell in love. Isn't it pretty? The perfect color and belted for this summer...


My first Mother's Day is coming up next Sunday, and I decided to treat myself and get this dress.
Ladies, we all need to reward ourselves sometimes, right? Wear something that make us feel beautiful is one of the best ways we can honor ourselves. And what better day to do that than Mother's Day??
I even got a surprise at the check out counter. The dress had a red $35 tag (Everyday Deal), but it rung up at $25. Yesterday was May 1, and it had just gone on monthly special! Score!

Every woman needs a pretty new dress for spring and summer. Have you picked one out yet? Do share! And if you check out the new JCP, let me know what you think. We can compare notes :)

Wednesday, March 28

Paleo "Apple Pie"

I deserved a treat today!
It was a long, uncomfortable weekend.
I visited an allergist on Friday, where I almost walked out twice because of the "culture clash" as the doctor described it. Note to Doctor, when you start off an appointment by saying that you "don't believe leaky gut syndrome exists," this really alienates your patients that attempt to be informed. Just because something isn't written up in your favorite medical journal, does not make it quack science.
I struggle with the resistance in allopathic medicine to listen to theories about the root of disease; I would think that a physician, someone who works in a helping profession, would at least be mildly curious about what is truly helping people (i.e. treating autoimmune and allergies by treating leaky gut with the Paleo diet, SCD, going grain-free, etc.)! OH well. I left on a good note, feeling like I planted a seed of awareness, and the doctor seemed to be mildly intrigued that my inflammatory and autoimmune conditions improved when I eliminated the reactive foods on my IgG panel two years ago. That's all you can do sometimes, is plant a seed. Much better than walking out and giving up :)

The doctor did run two allergy panel skin tests for IgE reactions. As far as the results are concerned, I only have true allergies to grass, weeds, cats and milk, and less significantly to peanuts, almonds and soy. 
Unfortunately my body says otherwise.
What seems to have happened is that I absorbed all of the substances that they injected me with for the test (wheat, milk, egg, soy, pollens, nuts, and so on...) and because I have IgG allergies to many of those things, it's been a miserable time.
I am finally coming out of the allergy fog, and feeling less stiff and enthesitis-y. 
Yes, I just made up a word  :) 
I finally felt a bit like myself again!

So I made Crock Pot applesauce. 
And then I made Paleo "Apple Pies!" 
(I suppose by composition, they are more like cobbler, but whatever.)
 These treats are something I came up with during our first month of eating Paleo, and I think you'll enjoy them quite a bit!


What you need:
First-
5-10 pounds peeled, cored, sliced and washed apples
1/2 cup filtered water
2+ tablespoons cinnamon (+ according to taste)

Later- 
almond meal
coconut cream (sold in cans or small aseptic boxes)

What you do:
First- make a batch of applesauce. This is easy to do!
You just need to adjust the size of your slow cooker and the cooking time depending upon how many apples you are working with.
For ideal cooking, the insert will be at least 1/2 full.
I used my six quart Cuisinart slow cooker and it was about 4/5 full of Braeburn apple slices.
I use a nifty apple corer/peeler/slicer gadget that we got as a wedding gift, and it makes this whole process fun and fast. I highly recommend getting one if you make applesauce often!

Fill an appropriately sized slow cooker insert with the clean, peeled pieces of apple.
Sprinkle cinnamon over the apples.
Pour water over everything.
Put the lid on, set to "Low" heat and let cook until apples are breaking down, water has absorbed and cooked out, and applesauce is the consistency you desire.
(I let mine go for six hours.)
Depending upon how long you cook it and how small your apple pieces were to begin with, you may want to mush applesauce with a potato masher to get a smooth texture.
(I leave mine as is; it's so soft the small chunks don't seem to matter.)

First, dish up some applesauce for yourself and whoever is with you, and make some "pies." 
Then store the rest: spoon applesauce into sterilized glass jars, let cool in the refrigerator overnight, and freeze. 
With just fifteen minutes of preparation and six hours of cook time, I have six jars full of fresh, homemade applesauce.
The ingredients cost under $5!
Making things homemade is a great way to save money and ensure your family is eating good food
without creepy preservatives or other undesirables.

For "pies"-
Spoon approximately one cup of applesauce into serving bowls. Scoop on one or two spoonfuls of coconut cream in each bowl, and sprinkle almond meal over the top. Coconut cream has a strong coconut flavor on its own, but when you stir everything together and take a bite, it really tastes like warm apple pie with a touch of cool whipped cream!
These are delicious.
Enjoy!

Sunday, July 31

Fabric Flowers

I finally found an easy tutorial for fabric flowers that makes sense to me! I can't wait to make some of these beautiful flowers for BG's headbands, outfits, and maybe even some Momma headbands for me :)

Pom Pom Fabric Flowers from LittleMissMomma.com:


And a great tutorial on Rolled Fabric Flowers at prudentbaby.com. These are a little more complicated (for me, anyway) but I'm hoping to figure it out eventually. They are darling!

Wednesday, July 6

Freedom of Cloth Blog Carnival

Just a quick post tonight to share something I found today. Over at Natural Parents Network they are hosting a "Freedom of Cloth Diaper Blog Carnival" for seven days, and featuring many articles regarding a specific cloth diapering topic each day this week. Yesterday, for example, was "Cloth Diapering Must Haves" and a bunch of blogging mamas gave their input on any and every accessory you might need for cloth diapering. Monday was all about recipes related to cloth diapering - homemade laundry detergent, baby wipe solution, etc. If you are interested in cloth diapering at all, you should join me in checking out the "carnival" this week. So much great information, and you can never know too much about something like cloth diapering :)

Thursday, June 30

Framed Fabric - Nursery Artwork


Today I changed my mind on the artwork for BG's room. I took out the Peter Rabbit illustrations, and put in pieces of the various fabrics I picked out for her room. I think when she's a little older, I'll put the Peter Rabbit pictures back in, but while she's so young and still developing her eyesight and taking in the world around her, I wanted to keep it simple, and went with the warm, familiar colors and patterns of the same fabrics she'll see when she's in her crib.

And, I finally got the frames hung on the wall! I like the arrangement of three by three. They aren't perfect, but that's okay. After all, I said I wanted a whimsical nursery :)

Monday, June 27

Mobile of Garden Friends


Here is a simple little project that took me all of thirty minutes start to finish. I ran across these adorable painted, wooden garden critters -a pretty butterfly, a smiling bumblebee, a happy frog, a colorful dragonfly, and an adorable snail (Hubs' pick)- at Jo Ann a few weeks back, and decided they would work perfectly as the focus of a little mobile idea I had brewing. I bought an embroidery hoop and some sheer ivory ribbon, and once I finally got out my glue gun last week, I went to town. First I cut five ribbons, two about twelve inches and three about fifteen inches long, and glued each critter to the end of a ribbon. Then I tied them (evenly spaced) around the plain wooden hoop, tied five more ribbons in the spaces, tied one big knot at the top, and voila - a mobile! It cost less than ten dollars for supplies and it's just what I wanted to hang above the changing table. Perfect for a little gal's garden room :)

Saturday, June 18

Simple & Affordable Nursery Art!

I just have to say, if you think you can't decorate a nursery or child's room (or your own room, for that matter) on a very strict budget, you are mistaken! I am having so much fun coming up with ideas and utilizing all my bargainista know-how to make BG's room a special place. It is turning out so much cuter than some room-in-a-bag you find at the baby store, and so much cheaper! And there's so much more thought and love behind it.

Ok, moving on to the reason for this post. Yesterday and today, I made some adorable art for BG's room - eleven pieces to hang up, in all - and only spent $11.65!

The first piece is a framed picture that Hubs and I found online and printed out on photo paper in a 5x7. I believe it's from an old Christmas card. I found a pretty black wooden frame at the dollar store, and voila! It's going to hang right next to the 12x12 framed name art I made (see last post).


The idea for this piece of art came about last week, when we finalized our choice of BG's middle name. We chose Liviya, which means "brave lioness," and then realized that, when paired with our last name which means "lamb," it alludes to the scripture describing the peace Christ will bring to the earth ('when lion and lamb will dwell together,' 'Lion of Judah/Lamb of God,' etc.). Hubs and I had an "ah-ha!" moment and decided we needed to find and frame a picture of a lion and lamb for BG's room, as a representation of two of her names.

The other ten pieces of art are from one of my all time favorite children's books: Beatrix Potter's Peter Rabbit. This idea is a spin-off of my original nursery concept to frame prints from Arnold Lobel's Frog & Toad books. I decided that with the garden theme that BG's room is taking on, Peter Rabbit would fit better. I scooped up a copy of the book at Goodwill the other day for 65 cents (score!) and, while this was totally against my book-loving nature, and it pained me, I cut out the pages of beautiful, classic artwork and trimmed them into 3.5x5 inch pieces to frame. (I justified this major book faux pas by reminding myself that I already own three copies of Peter Rabbit in various forms, and there were a handful of other copies on the shelf at Goodwill as well.) Then I headed to the dollar store for frames. They have some really nice new ones in stock, and I got ten distressed gold frames that are going to look darling on her wall. I cut carefully, dusted the glass delicately, framed precisely, and I'm done! Here are two photos of what I did - they are terrible quality, but my camera is terrible (we are begging for a new one on our baby registry):


I haven't decided if I'm going to hang them in two rows of five, or take one away and do three rows of three. I can't wait to hang them up, they turned out even better than I hoped! And the gold color looks awesome with the cream and green walls in BG's room.
Another project down, many more to go...

Monday, June 13

Completed Sewing Project - Baby Leg Warmers!

I did it! I made baby leg warmers! These are SO fast to make, I can't get over it. I had a few issues with the cuff on two of them; it came out somewhat crooked. But hopefully they'll be so cute on our little girly's legs that no one will even notice :)


Thursday, June 2

Glider Rocker for Baby's Room

This is a little project that has turned out even easier than I thought it would. I bought this glider rocker at a thrift store for $17 back in March or April:


I was planning to re-cover the inner foam cushions with a home decor fabric that goes with the color scheme in Baby's room.
As my due date approaches little by little, and my sewing table isn't really usable while we remodel, I've been wondering what I'll do for cushions. I read something the other day about using the outdoor chair cushions that Peri 1 and World Market sell. I thought this sounded like a great plan, but these cushions run about $40 each, or more.
Well, Hubs and I were at IKEA over the weekend and I passed these cushions in their summer outdoor area, and they were on close out for $12.99 each!


They had less than ten left, all in the yellow and pink plaid, so I bought two just in case they would work. Took them home, put them on the glider rocker, and they fit perfectly! So there's one less project to take on in case Baby arrives earlier than expected, or I get hung up on another project for her room. I love finding great deals :)

Monday, May 30

Sew Some Baby Leg Warmers!

Have you ever heard of BabyLegs? They are new to me. But after seeing a post about them on Life's Little Embellishments, I got inspired and excited about them. They are little leg warmers for babies! Better than baby tights, because they don't have a top section to pull down for every diaper change or when potty training, and they protect little knees when crawling - great idea. They even have a few styles for little boys. But they are a little spendy.
But thankfully, Rachel at Life's Little Embellishments found a tutorial to make your own baby leg warmers at the Wulfekuhle journey. It is a really simple and VERY affordable way to build up a supply of your own. All you need is a sewing machine, thread, and a pair of girls' or ladies' knee high socks. Check out some of these handmade creations... while I go out and shop for socks to make some for Baby V!

From the Wulfekuhle journey:


From Life's Little Embellishments:

The striped pair at the bottom are a pair of "real" BabyLegs and the rest are her own cute handmade leg warmers!

Tuesday, May 17

Healthy Choices for Baby

I am now 25 weeks pregnant, and I couldn't be more grateful for that. Baby V is moving all around in my tummy, and I can feel her every day now. I can feel her punching, kicking, and doing somersaults, but they are gentle and still somewhat muffled because of the anterior (front) position of the placenta. Our next OB check with my perinatologist is in a week, and we have another detailed growth ultrasound scheduled. I'm looking forward to seeing how much she has developed and grown since the last one at 18 weeks!

Judging by my growing baby bump belly and her activity in there, she is thriving. I pray for her every day, that she'll be healthy and not ever have any of the health problems I've had to deal with. God is in charge of her physical development, and we trust Him to take care of her. Meanwhile, Hubs and I have been discussing the healthy choices we want for our family, so we can give her every advantage from an environmental aspect. I thought I'd share them here with you all.

Before I share my big three, tell me: Do you do any of these things for your family? Do you have any other ideas to add?

Decision 1:

We are going to use cloth diapers and cloth baby wipes with our own cleaning solution, so we have control over the chemicals (or rather, so we can avoid the chemicals) that will be touching our baby's skin every day. Before we were even halfway through this pregnancy, Hubs and I read enough about the [toxic] chemicals in disposables (Dioxin, TBT, SAP) to commit to cloth without looking back.
Plus, the environmental bonus feels good. We won't be contributing to the huge mountains of little "poop bombs" sitting across our country in landfills. Did you know that disposable diapers take 500 years to break down? Yikes! Do you think that at some point our communities need to come together and address the fact that our landfills aren't bottomless pits? Human waste belongs in the sewer where it can go through the proper treatment, not the ground where it can get into our water supply.
Moving on though :) As a one-income household, the financial bonus of using cloth is huge! We'll save thousands of dollars not buying diapers and wipes monthly for those first few years. Plus, we'll be able to keep our small garbage can with the city disposal service. (We pay $25 a month now, and it would cost around $50 a month for the larger can to fit all the disposables in each week - that's a 100% cost increase!) And maybe the best bonus of all: no diaper-stinky garbage cans in the house ;)

Decision 2:

We've decided we'll make our own baby food. It really couldn't be easier to do, and very economical because we'll just be pureeing and cooking the veggies and fruits we buy for ourselves. It won't really be a chore, because I enjoy working with food and cooking. I expect it to be a fun activity, and it will feel GREAT to know what goes in Baby's food - no preservatives or pesticides, or packaging chemicals like BPA. And again, as a one-income family it's a smart and simple money-saving choice for us.

Decision 3:
Of these three decisions, this one is most important to me. My greatest goal as a new mom is to breastfeed my baby. The many benefits, from financial (it's free!) to convenience on the go (no bottles or formula mix or water needed!) are obvious, and then the health benefits for Baby. With all of the auto-immune and inflammatory conditions my body struggles with, I am always interested in research and information about them. Did you know breastmilk can prevent a multitude of diseases, including Ulcerative Colitis (I have that), asthma (and that), allergies (those too), arthritis (yep, got it). I'm committed to do whatever it takes to make breastfeeding work!
Part of why it is so important to me is because I was 100% formula fed as a baby, because I was adopted. From the age of ten onward, I've developed one auto-immune disease after another. I can't deny that there seems to be a connection between being formula fed, and my current state of health. So, I've made one single goal for the first month post-partum, and that is to start a successful routine of exclusively breastfeeding my baby. I am going to structure those first few weeks around this one goal.
I'm going to ignore housework, take every opportunity to rest and relax, ask for and welcome help - whatever I can do to succeed at this. It means a LOT to me to try to reach this goal, because I want to give our little one the best advantage I can in case the genes passed on from me are anything but good ones. I am even planning to have a lactation consultant come to our home to work with us if need be.
I know that there are sometimes medical reasons for having to use formula, and we will cross that bridge if we have to. But having this goal in mind and setting us up for success is the best way I can make it happen!


I've been doing a lot of reading, and thinking, and talking with tons of mothers throughout my pregnancy, and I've come to the conclusion that many women do not make informed choices about their labor, delivery, and motherhood. And that's a shame. It's largely a cultural failure I think, because we aren't told the whole story or given options. But I think that as parents we need to know the whole story and be able to make our own informed choices. We need to be empowered with information, and know we're not at the mercy of any (well-meaning but uninformed) doctor, nurse, neighbor or even baby-gadget salesperson. We're going to be parents, and now is the time to ask questions and make decisions for our families with sound reasons behind them.

So get out there, moms and dads, and ask questions, learn, get support, and be confident in your choices! All you can do is give your best, with what you have, where you are. If you're doing that, you should be proud - you are a great parent :)

Monday, April 18

Fast & Easy Baby Skirt from WinkDesigns


I found the energy today to roll off the couch and tackle my first "Fat Quarter Baby Skirt." I am amazed - I have never even done elastic before, and I made the entire thing in about one hour. And remember, I am a BEGINNER! I am falling in love with sewing, and so happy about it. I think everything I've absorbed watching my mom sew all those years is finally kicking in. Something right must be happening in my brain, along with all the pregnancy fog rolling around up there :)

Here it is, made of a darling creamy grey colored fat quarter with an orange pattern of little birds and swirls all over it:

It cost all of 99 cents because fat quarters were on sale last week at JoAnn! If you sew AT ALL, you must try this project. Brilliant idea, Wink Designs; thanks for the inspiration!

Update: Here is another skirt, finished in under two hours, made of soft JoAnn flannel. I like this one even more than the first!

Tuesday, April 5

Cloth Diapering Pt. IV - All-Natural Baby Wipes

While I'm still undecided on what fabric to use for my homemade baby wipes, Hubs and I are both set on using cloth wipes as well as cloth diapering. We're both feeling great about the fact that we'll know exactly what is going to be next to Baby's skin, instead of being at the mercy of giant American companies that use all kinds of unpronounceable chemicals in their products (many of which aren't allowed even for adult products in Europe! ick!).

I think I've decided on the solution we'll use for our baby wipes. Here is the recipe:

1 cup water
1 tbsp. Baby Dr. Bronner's liquid castile
1 tbsp. apricot oil or almond oil
2 drops tea tree essential oil
5 drops lavender essential oil

I got the recipe from this great little article at Natural Family Online. I really enjoyed the article. It lists a very basic to do/must have list for new parents. It's like they read my mind and then wrote the article!
Hubs and I have been trying our hardest to stay away from all the little doo-dads and fancy accessories that the baby industry tries to get you to think you need when you're shopping for your first baby. I've been to enough baby showers and hung around enough experienced moms to know that much of that stuff is just not needed. My goal is to stick with what is simple, healthy, and necessary for my baby. The most important thing she needs, after all, is love and good care. Those things do not cost any money and make the most difference in a baby's life :)

Sunday, April 3

Cloth Diapering Pt. II - Wool Covers

My first order of business in my cloth diaper sewing adventure is to zip off to the thrift store and see what kinds of old wool sweaters I can snag for next to nothing. See, I ran across pre-made wool diaper covers in the past few months while researching cloth diapers, but saw the cost and said, "Not happening." I considered knitting my own, and that's still a possibility.
Then I found these websites, one with the scoop on making your own wool diaper covers out of old wool sweaters, another with a pattern and instructions to do it, and yet another with instructions on how to lanolize and relanolize occasionally, to keep the moisture resistance. I will definitely post pics once I get this figured out. I can't imagine NOT sewing up four wool diaper covers for $5-10. Here I go!

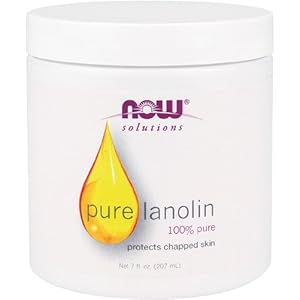
(Yep, it's the same old Lanolin you might having laying around if you're breastfeeding!)


I think these wool covers made from old sweaters are the coolest thing EVER, especially the ones with pants attached:


Can you believe someone snagged these as old kids sweaters at a thrift store and sewed them into these darling covers and pants? I hope to create some covers as cute as these. Stay tuned! :)

Saturday, April 2

Cloth Diapering Pt. I - We're Sold!

I am super passionate about cloth diapering already. I am getting so excited about it! Hubs and I are completely in agreement - and he got convinced all on his own!
We have done tons of research over the past few months, and talked to a good friend that cloth diapers her little girl. We decided that we'd like to use:

cotton prefolds

with Snappis,

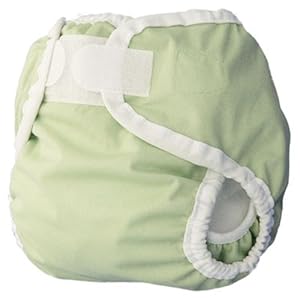
under Thirsties covers

and wool covers;

and
FuzziBunz One Size AIO's (All-in-One's)

I was not initially looking at "modern" cloth diapers like FuzziBunz because I was intimidated by the price. Then a friend gave me her experience with them, and I realized - they are an innovative, amazing product, made by an American company started by a mom, and an INVESTMENT that will last us through one or two more babies. Incredibly easy-to-use and CUTE, colorful cloth diapers for a one-time cost - Wow, can't beat that! (Disposables are SO not a one-time cost!) I checked out the FuzziBunz website at her suggestion. From their FAQ page to the benefits of cloth diapering, even tips to make it MORE green. Check it out.
We figured out that we can buy one or two FuzziBunz OS diaper each month ($20 each) and have a good stock ready by the time she's born. FuzziBunz, AIO's, any cloth diapers are really very affordable when you look at it in little steps like this.

Here are some websites with free patterns for cloth diapers and accessories:
www.diapersewing.com
www.cheekydiapers.com
www.zany-zebra.com

This site has supplies for sewing, like PUL fabric for covers, and snaps for covers and AIO's: www.wahmsupply.com

I am thrilled at the idea that we will be done buying diapers and accessories a few months into our baby's life - once we have our stock, we get to stop buying diapers! We will have a sense of control over our finances and baby's health -cloth will not likely create rashes like disposables do, and there will be no icky chemicals seeping into baby's skin. I feel empowered. Depending on how much help we receive at our baby shower, I will make up the difference by saving and buying them ourselves, and doing some creative fabric hunting and sewing.