Showing posts with label GF baking. Show all posts

Thursday, May 1

Where to Begin? A Summary of Recent Events

I admittedly wait long periods of time between my posts recently, and the farther apart they are, the more overwhelming it is to try and sit down and write out the most current events. I thought that was just due to trying to remember what happened, the farther in the past it goes. Now I think it's also more about how time keeps moving, more things keep happening, the list of items to blog about and update grows longer and - recently - weightier.

My last post was about getting ready for "Plan B," an upgrade to my PTBD biliary drain - to do angioplasty of the bile ducts with a balloon and open up one of the main ones that has serious scar tissue narrowing. I had that procedure done at the beginning of April.

Here I am, ready to go... little did we know it would be about six more hours wait ;)

I came out of it with a French drain tube doubled in size. The doctor exchanged the 8 gauge drain tube I had to a 16 gauge. Wooey, the first look I got under that bandage made me grateful I'm not a wound care nurse, but much more capable, not as easily grossed-out people are in that profession! :)

I was in a groggy state for a day and a half afterward, but it was so good to be home!
That means it has been a whole month with this larger PTBD, and unfortunately, no changes. I tried capping the drain on two different occasions, following doctor instructions. It went well overall; right now it's capped. I was losing way too many electrolytes in the fluid output of the drain, so I had to. I'm still battling those low levels of magnesium and potassium, as well as working really hard (it's not easy, for some reason!) to keep drinking water and other wholesome beverages, and eat good meals. It's a bummer that there were no changes to my lab numbers after this larger drain; even when the drain bag was attached, my bilirubin was still up at 19. Yikes. And the jaundice has stayed the same, and itching has returned WORSE. Ah if I could pick pain or itching, I'd choose pain. Itching is slow torture!

As I mentioned, there haven't been significant or really even noteable changes, improvements, to my lab numbers. This is the reason for my next big piece of news...

I'm glad we got this news the week of Easter. It made everything easier. I cherish the Hope of and in the Resurrection.
Always - Only - Jesus.

I've been referred to the University for another liver transplant.

(:sigh:)


One of my liver doctors sent over the referral, and I'm just awaiting their call one of these days to set up all those crazy pre-transplant evaluation appointments. It's possibly going to be a busy summer... if only it will be full of things like swimming lessons and dance classes with my Victory bear, rather than doctor appointments and uncomfortable procedures?? I will keep hoping and believing.
It's something that's come up in conversation numerous times since about four years ago when my team started noticing that the PSC (primary sclerosing cholangitis) may have recurred. But it was never so definite or concrete as now.

This is a picture of the imaging from my second-to-last procedure, when the first drain was "installed." They got it in and were able to inject dye to illuminate the ducts (the darkened, tree root looking things).
There should be so many more, especially on the left...

That is one mass of sharp, irritating to my skin blue stitches. And one big drain! I flush it with saline like this once or twice a day.

Just for the record, heading into another twelve hour surgery is not what makes me take so many deep breaths, and need time to process these developments, and soak in the Word and worship to be fueled up for those inevitable Mind Monsters. It's not that that scares me. This time I would be heading into a transplant not as a light-hearted teenager, but as a wife and mom to a toddler. I want to be here for them. Always. And a waiting list of approximately, at all times, 17,000 people needing a new liver, versus only the 6,000 per year that receive one... well, do the math. (Source)
Of course this is a fear that I don't dive in too deep to, because my heart and that Holy Spirit voice thankfully always tug me back to earth and say, "but Emily, BUT GOD. This may look daunting, BUT GOD. He can do anything, and He wouldn't have brought you this far to leave you or let you be done living now."

So anyway, that's the biggest news I had. My days are so full of joy and memory making, it's not derailed me too much, just mostly made me live all the more intentionally to soak up the everyday moments. Hobby Lobby had this painted sign I wanted to get for my living room at one time (coincidentally, it's not there anymore). It said, "There is always always ALWAYS something to be thankful for." How true that is!


I had a glorious nap last week, later than usual, and woke up to a gorgeous sunset...

A couple Sundays ago, we took a short drive to the Peninsula and found a secret children's garden. Dreamy looking mature trees, and little fairy gardens someone's made. Miss V was on the hunt for Peter Rabbit :)


The Secret Garden
Momma and Miss V made it to Costco all by ourselves the other day! What a fun time and a big accomplishment :)

I experienced a huge glimmer of hopeful progress the other day. My eyes became more and more white throughout the day, and by evening they were whiter than they'd been since Christmas! Unfortunately back to very golden the next day, but that event sure was encouraging. Looking for more of those in days and weeks to come!

We always enjoy the beautiful garden at the clinic. What beautiful flowers and trees we get to appreciate because someone works very hard at planting and tending.

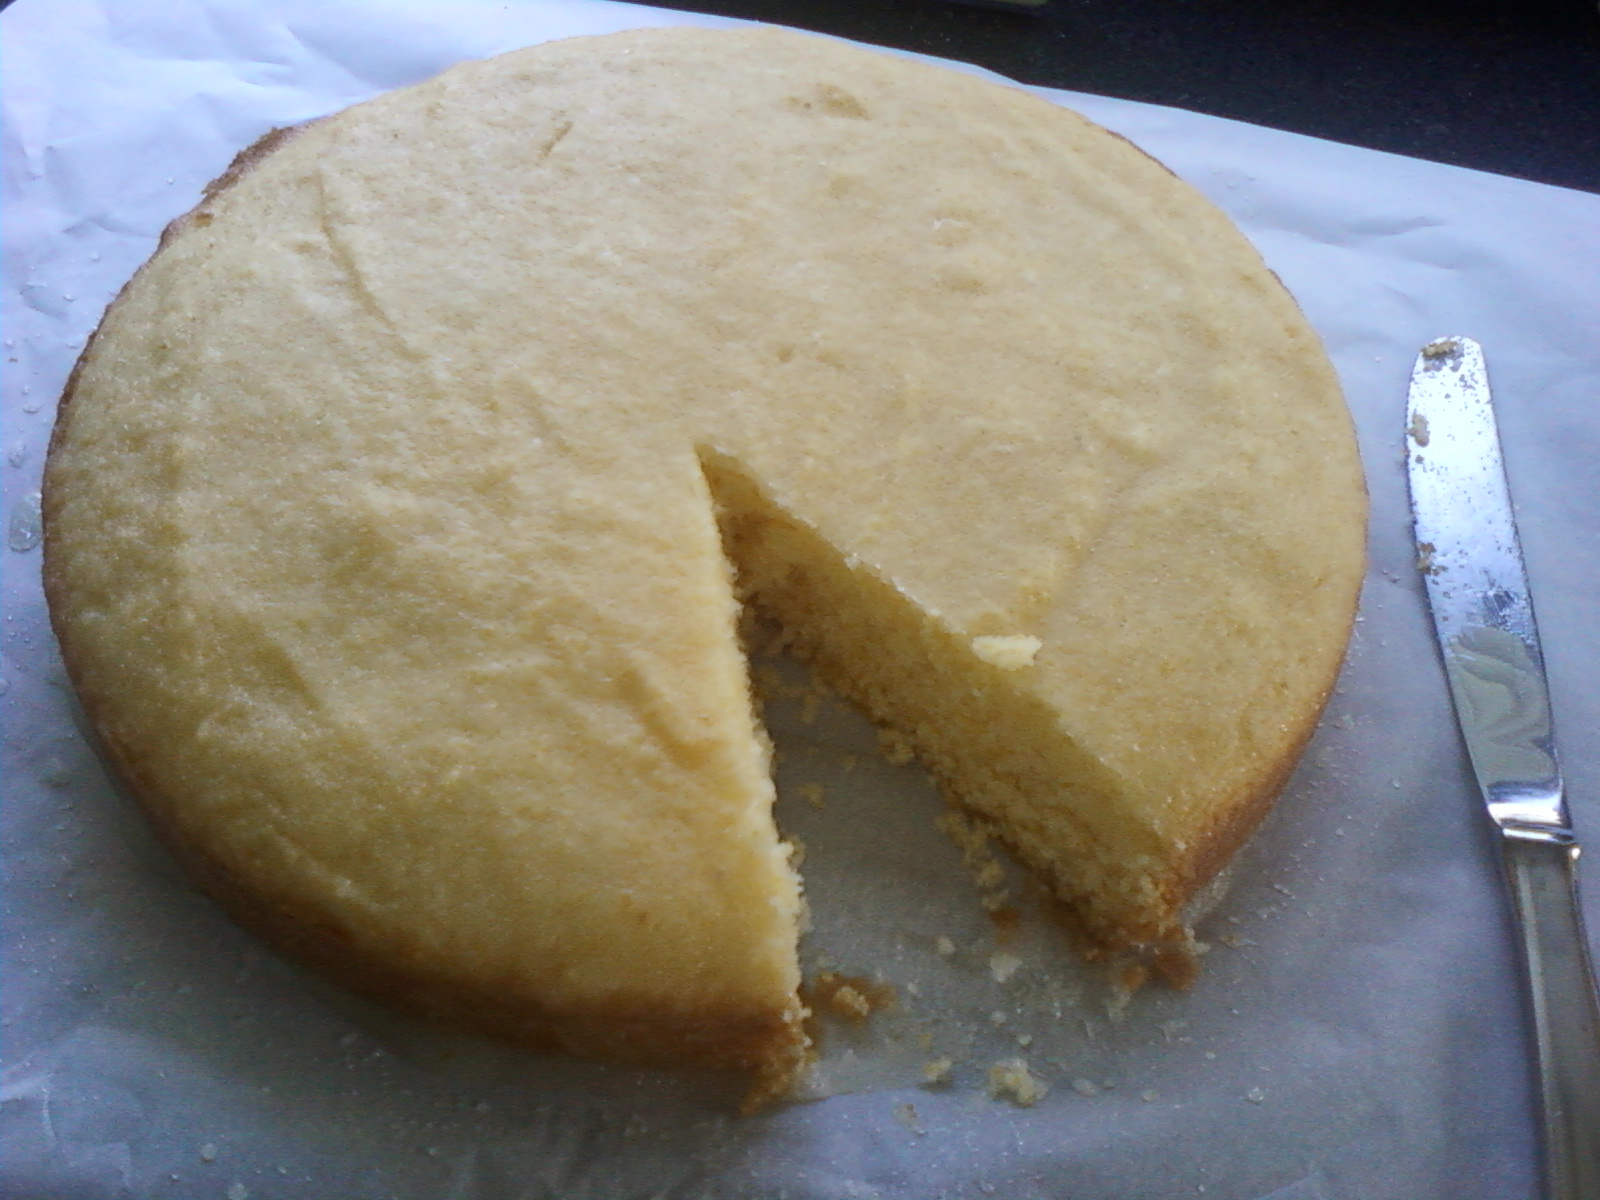
I've been marveling at God's grace and sustaining me to be able to keep up with Miss V around the house, and I'm on a baking roll this week as well! V and I made grain-free "puffy oven pancakes" on Monday, and I whipped up a batch of sugar cookie dough from a gluten free Hodgson Mills mix. We never got to make Christmas cookies.... or football/Superbowl cookies... Valentine cookies... or shamrock cookies... or Easter cookies. Despite me getting everything including the appropriate cookie cutters out on the counter, every time I've been too tired. Well we are going to make our Easter/spring cookies, no such thing as too late :)
Late last night I couldn't sleep and made coconut flour blueberry scones. (Yep we're still very much gluten free around here. We added back grains last year when I needed to put on weight desperately. Phasing them out again little by little, because all three of us do better without.)
Then today I made a rhubarb crisp, grain free, vegan, refined sugar free, with local rhubarb from a farm down the road. Delish! I have missed baking very much, and can't believe how much I've been able to do including cleaning up afterward, doing multiple loads of dishes and laundry each day, hanging with Miss V and watching a movie a day and doing crafts with her. Every day I have strength and energy to keep up and make life fun in my home, I am SO thrilled and grateful!

Speaking of energy levels and miracles...
Another hurdle I'm in process of jumping is some wonky blood and bleeding issues. My exhaustion level didn't fade enough once I capped my drain last week, and I had a hunch about not just electrolytes but also my blood counts. Sure enough, my doctor reported back to me that my Hemoglobin was at 8 and Hematocrit 26. My Prothrombin time and INR (both indicators of the time it takes for your blood to clot) are double what they should be. I actually had to wait a few hours while I was infused with three units of Plasma before my procedure earlier this month, because my numbers were past their cut off for a safe procedure.
It has to do with the challenges my liver is fighting through, and the state of sickness it is in; PT and INR rise. Not much you can do, I am now taking Vitamin K but really I just need healing! I'm really starting to feel it and noticing that it's not really improving.
Oh more blood drama! It's been almost a full year since my intense war against Autoimmune Thrombocytopenia ended and [I believe] God healed me and put that nasty disease into remission forever! But I'll never forget those trips to the ER hanging on as I was on the verge of passing out and my skin was so white and cold.
I got my blood drawn yesterday evening to check Hemoglobin, Hematocrit, and to do a Type and cross for a blood transfusion. It's inevitable that I'll need one within a week (actually, it's been a week since my labs were drawn last and my doctor informed me of the electrolyte and blood situation and my need for a transfusion.) but the Infusion Center where they do blood is so booked up, I can't get in until Monday. I do NOT want to end up in a critical situation ever again due to low red blood cells, so I figured checking today would be a good idea, we'll see where my numbers are at (knowing I'm still having bleeding issues - dumb gut ulcers!) and if needed, the team will go ahead and put me in the hospital for a short stay to receive a blood transfusion that way. I'd much rather give up a weekend day doing that then have to rush to the ER late Sunday night because the numbers got out of control.
Please say a prayer for clear results and a great plan of action. And as always, a blood match for me that's clean and healthy!

I think that is the summary of the major things going on. It's been a busy month - anyone else feel like April just FLEW by? But I am excited for May; it's my "happy month." :)
I will celebrate thirteen years since my liver transplant on Cinco de Mayo the 5th, my third Mother's Day on the 10th, and my 30th birthday at the end of the month! It's a good life. Never let go of your vision or your fight.

And don't take life or yourself too seriously! ;)

Right?? :)
Interesting to me, my hair is getting back to its curly, wavy state. It was like this before my liver transplant in high school, and changed to being mostly straight when I was pregnant with Miss V. Now, the curls returneth!
Here is a group of statements I wrote out to myself last week when things were feeling overwhelming, lonely and anxious. A declaration:

"I choose to live.
I choose to keep moving.
I choose to take one day at a time.
I choose to not quit.
I choose to trust Jesus.
I choose to believe the enduring, unfailing promises of God.
I choose to look high and low, far and wide, to find any joy I can find in the most difficult of days.
I choose to hope.
I choose to stay in the fight.
I choose to be fully present in the moments for myself, my daughter, and my husband.
I choose to thank God in every moment.
I choose life.
I choose joy."


And here is a beautiful prayer I discovered; I've heard and read parts of it before, but wanted to see it in its entirety. I want to print it out and carry it in my purse with me to remind me of these truths.

St Patrick's Breastplate

Christ be with me, Christ within me
Christ behind me, Christ before me
Christ beside me, Christ to win me
Christ to comfort me and restore me.
Christ beneath me, Christ above me
Christ in quiet, Christ in danger
Christ in hearts of all that love me
Christ in mouth of friend or stranger.
(390-461 A.D.)

Tuesday, July 23

Crock Pot [keepin' the kitchen cool!] GLUTEN FREE Banana Bread

Wow, what a ride it has been these past ten months. There is much to update, so much I want to share that I've been unsure of even where to start. This post will break my writer's block/overload, perhaps, since it's just for fun! :)
The one health update I'll share today is that I am thrilled to report, my platelet count has been steadily climbing since I left the hospital in June! Yesterday it came back one point below NORMAL range!  God is healing me thru and thru!
So onto the banana bread fun!
I discovered this idea when we had a major heat wave the weekend of Mother's Day, and I wanted to make quick bread for the brunch, but did NOT want my kitchen to get any hotter than it already was!
Enter my favorite kitchen appliance: the crock pot! This recipe as my inspiration,
I made some modifications and voila, Banana bread in under three hours with no extra mercury rising in the house.
What you need:
1 3/4 cup Trader Joe's Gluten Free flour blend
1 tsp xanthan gum
2 tsps baking powder
1/4 tsp baking soda
1/2 tsp sea salt
3/4 cup coconut sugar (check out Madhava brand Organic Coconut Sugar thru Subscribe & Save on Amazon!)
1/3 cup organic butter or coconut oil
2 cage free eggs, beaten
2 ripe, medium to large size bananas (or 3 small), mashed
1 tsp pure vanilla extract (I use Trader Joe's Pure Bourbon Vanilla Extract),
1/2 cup frozen organic blueberries
What you do:
Grease the crock of a 3 (ish) quart slow cooker with butter or coconut oil. Set aside.
In a medium mixing bowl, sift together all dry ingredients except sugar (flour, gum, soda, powder, salt).
In another bowl, cream together butter (or coconut oil) with coconut sugar until blended. Gently mix in beaten eggs, mashed bananas, and vanilla.
Add in the dry ingredients slowly, blending well with a whisk.
Stir in the blueberries (no thawing needed).
Pour batter into pregreased crock, smoothing the top with spatula. Cover and set to High. Walk away - you're basically done! :)
Check the bread with a toothpick after 2 hours. It will be done between two and three hours. (Slow cooker power levels vary by brand.)
When bread is done, toothpick should come out clean, but bread will be moist and oil sizzling on the edges. Remove lid and let cool/set up for five minutes. Cut into pieces and scoop out of crock, or turn out the whole loaf onto a plate and cut to serve
Enjoy!
*Sometimes it is recommended to prop open the lid with a wooden spoon when baking in crock pots. I've never done this, but know it's an option if bread is too moist/not setting up.

Update: This recipe is even more fool proof than I thought! I ran out of Gf flour blend but had ripe bananas to use, so I thought I woukd experiment.
I used 1 cup brown rice flour and 3/4 cup teff flour. I was much more lax with the mixing too, I just combined all the wet ingreds together, added the dry, and put in the crock. This time I set the slow cooker on Low and let it go 4 hours. It turned out great - moist and delicious again! it was just slightly darker in color because of the teff flour.
so there you go, this recipe is even more versatile tban we knew!
If you make any changes be sure and comment to share your experience :)

Tuesday, July 3

Red [Brown] & Blue Berry Muffins!

Just in time for the 4th of July, here is a recipe for Red and Blue colored muffins, free of gluten, dairy, eggs, soy, refined sugar, legumes, and very low in grains...


These muffins are delicious. Soft, moist (though a bit crumbly) in texture, the chestnut flour gives them a warm nutty flavor while the blueberries sweeten and the raspberries give a little tang. They are an achievement I'm most proud of!


I have tested this recipe three different times, changing at least one ingredient each time. The last test was done using mini-cupcake liners and my new mini cupcake tin I purchased in prep for Victory's first birthday.
They turned out well each time, which tells me that they are nearly foolproof muffins. It helps (and somehow feels more decadent) to eat them with a spoon in a little bowl; this way you're sure to get every last crumb in your mouth too!

This version I'm sharing with you was my third experiment. It uses the highest ratio of Chestnut flour, I'm guessing this is why these were the darkest in color of the three versions. It also uses the lowest amount of grains, so that's why I picked it to share. If you're interested in the other two (just as delicious) versions using rice flour and tapioca flour, comment and I will post them.

This recipe came about a few weeks back, when there was literally nothing to eat in our kitchen but a few ingredients. A few gluten free flours I wanted to get rid of, frozen berry blend mix from Costco, and part of a bag of Chestnut flour leftover from my birthday Carrot Cake Cupcakes. I pulled my Flying Apron Baking Book off the shelf and found a recipe for "Maple Berry Muffins." I modified it to be as Primal, grain-free and low-sugar as possible, and three baking sessions later, here are these muffins.

These taste so good, and look so pretty, that they may be making an appearance at Victory's 1st birthday party next month, complete with fresh blackberries from our garden! I hope you enjoy them as much as we have (that includes me, Hubs, my mom, our friends, our friends' kids, our neighbors... they are crowd pleasers)!


Red (Brown) & Blue Berry Muffins

Makes 10-12 traditional size muffins, 24+ mini muffins

What you need:

1 1/2 cups chestnut flour, such as Dowd & Rogers
1/2 cup sorghum flour
1/2 tsp baking soda
1+ cup water
1/2 tsp apple cider vinegar
1 tsp vanilla extract
1/3 cup grapeseed oil or olive oil
1/3 cup pure organic maple syrup OR 1/4 cup maple sugar
1/2 tsp cinnamon
1/4 tsp ginger, optional
1/4 tsp sea salt
1/2 cup fresh/frozen raspberries
1/2 cup fresh/frozen blueberries

*I have been reading Michael Ruhlman's Ratio, and I have to say, it pains me to list out these measurements for you, knowing that if they were weights instead, you'd be essentially guaranteed a perfect muffin. My blog may turn into a recipe-by-ratio, baking-by-weight destination in the future, because I am really loving that concept. In the meantime, go with your gut. Baking without gluten really isn't so intimidating or risky, just pay attention to the texture of your batter and have fun! That is what it's really about :)

What you do:


Preheat oven to 365 degrees. Prepare your muffin tin, using festive paper liners.
In small-medium mixing bowl, combine dry ingredients and set aside.
Using stand mixer, whisk together liquid ingredients on low until blended.
Slowly add dry ingredients to liquid mix, on medium speed, until smooth. Add water if mixture seems to need more liquid. Batter will be runny, similar to pancake batter, or a slightly watery brownie batter.
Scoop 1/4 cup batter into each muffin cup. Depending upon how much water used, you will get 10 to 12 traditionally sized muffins.
Drop berries (can be frozen still) on top of batter in each muffin cup.
Bake until golden and tops are slightly firm to touch. It took 20 minutes for my traditional size muffins to bake (check at 15), and less than 10 minutes for the mini muffins (check at 5 minutes).

Note: Don't stress too much about getting them perfectly done. The beauty of baking without eggs is that even if your muffins turn out to be not quite done, they won't hurt you!


Enjoy! (I know you will!)
These would be delicious set on top of a small bowl of coconut milk ice cream... Excuse me while I steal away to my kitchen to see if I have what's needed to make that happen ;)

Have a festive 4th of July with family, friends, fireworks, or whatever else helps you celebrate all that our nation's freedom has given you. We are so blessed to live in the Land of the Free and the Home of the Brave. Happy birthday America!

Saturday, June 9

California Summer Avocado Pie

Today I am featuring a recipe from an outside source: the above pictured California Summer Avocado Pie via the  California Avocado Commission. It comes from their website, avocado.org. I got their monthly email this week, and it is chock full of summer recipes using beautiful California Avocados. Don't worry, you can be in the loop too! Sign up for their emails and check out more recipes here.

Source: avocado.org
Okay, does this summer pie not look absolutely decadent and creamy - and yet also light and refreshing? The perfect treat for the summer ahead- reward yourself after a day of hard work in the yard, or share with friends at an afternoon BBQ. Whatever the occasion, with the right substitutions this pie won't hurt you; it's full of good things!

First, let's establish a fact: Avocados are wonderful. You can cut one open and snack on it in slices or with a spoon, just plain like you would any other fruit. Make guacamole in minutes (delicious on top of a burger or chicken) by mashing one with a bit of water -or lime juice if you can eat citrus-, minced jalapeno, and a dash of salt. Avocados are a lovely and satisfying replacement for dairy in your diet - they add smooth, cool flavor to spicy Mexican food and provide a delicious creamy topping to burgers ... they thicken and enrich the texture of smoothies... Avocados make all sorts of desserts, even pudding! (Have you seen this tip before? Blend avocado, banana, and cocoa powder, and you've got chocolate pudding that's the perfect texture, nutritious and free of gluten, dairy, eggs and sugar!)

Best of all, avocados give you a healthy dose of anti-inflammatory, good fats. For this reason, avocados have been a God-send to me while I've been exclusively breastfeeding and experiencing occasional malabsorption issues from UC flares.Thank you, avocados! Read more about the nutritional benefits of these green beauties here: Alligator Pear Benefits.

Avocado Pie


I won't write out the ingredients or full recipe, because they are quite simple and listed clearly - just follow the link to the recipe. However, I am thinking the recipe needs just a few tweaks to make it Paleo - here are my suggestions:
  • Replace sweetened condensed milk with full-fat coconut milk
  • Lime juice and zest could be more delicious than lemon!
  • You can omit the graham-cracker crust altogether and pour the avocado mixture right into a glass pie pan or individual ramekins, and rename this "Avocado Custard" :)
  • or, make a Paleo-approved crust. You can make up your own very easily by trying different ingredients. One option is to blend coconut oil, almond or hazelnut meal, and maple syrup until you have the right consistency, pack mixture into pie pan, bake for a couple minutes to crisp and brown.
  • Nix the whipped cream
  • Garnish with nuts if desired and lime zest curls for a pretty decoration!
Now it's time for pie :)

Sunday, June 3

Birthday [Carrot Cake] Cupcakes

Thursday was my birthday, and I made myself a special treat. Carrot cupcakes. Free of grains, gluten, dairy, eggs, soy, almonds, refined sugar...
This was my first experience with chestnut flour - baking or eating - and I must say, it will definitely not be my last. (I'm glad I signed up to get a small bag of it every couple of months through Amazon.com Subscribe & Save!) The cupcakes turned out moist, soft, and cinnamon-y delicious. Chestnut flour has swag.

I frosted the cupcakes with a quick glaze-style icing I made from palm shortening, shredded coconut, maple syrup, local honey, and coconut oil. I spooned that on while it was still liquid, then topped them with leftover grated carrot and organic dried coconut flakes and left to set.
These were good by themselves, better enjoyed with a cup of coffee, and best with a bowl of coconut ice cream on the side!
The recipe made ten cupcakes, and it was the perfect amount to share with my husband and enjoy my birthday. I ate more than half of those ten in about twenty-four hours. It was my birthday and I indulged.


I saw the recipe featured last month at Brittany Angell's gluten-free, dairy-free site Real Sustenance, and bookmarked it for my special day. If you have never checked out Brittany's blog, head over there now and look at her recipes. I have made two of them now, these cupcakes and the Samoa cookies (original recipe). She is very talented and I'm so glad to have found her blog!

I made the cupcakes according to Brittany's recipe, with a few ingredient changes, less sweetener, and a misstep in mixing. It is a forgiving recipe, because they still turned out great! I give her all credit, however I only will list the ingredients I used and the steps I took to make these cupcakes.


[Grain-Free, Gluten-Free, Dairy-Free, Egg-Free, Soy-Free, Almond-Free]

Carrot Cake Cupcakes

Recipe credit: Brittany Angell, RealSustenance.com


What you need:
  • 1/4 cup natural applesauce (no sweeteners added)
  • 1/2 cup coconut milk
  • 1/4 cup grapeseed oil
  • 1 teaspoon gluten-free, alcohol-free vanilla extract
  • 1 1/4 cup Chestnut flour
  • 1 tablespoon cinnamon 
  • 1/4 cup Sucanat
  • 2 teaspoon baking powder 
  • 1 cup washed, peeled, grated organic carrots (I minced mine in the small food processor)
  • 1 teaspoon apple cider vinegar*
What you do:

Preheat oven to 325 degrees.
Line muffin tin with 10 paper liners.
Measure wet ingredients (applesauce, coconut milk, grapeseed oil, vanilla, and vinegar) into a large bowl, stir together to combine.
Add in the dry ingredients (chestnut flour, cinnamon, sucanat, baking powder) and blend with a spatula. Pour in grated carrots and gently fold together until batter is evenly mixed.
Scoop the batter into muffin cups and place into the oven. Bake for 30 minutes.
(Cupcakes will be finished when toothpick comes out clean.)

These cupcakes are delicious. It was fun sharing them and hearing the reactions - "full of flavor," and "If I hadn't been told already that these are gluten-free and dairy-free, I wouldn't have known!" "Yummy!"

I'm happy to report to you, grain-free does not mean delicious dessert free. You can come up with a special birthday treat for any diet. Do you have a favorite annual celebratory treat that needs converting or replacing, to be safe and healthy for you and/or loved ones? Do share and I'd love to brainstorm with you about substitutions and new ideas. And check out RealSustenance.com for more great ideas.

Playing around with cupcakes and my Gerbera daisy plate

It was a treat to find my Gerbera daisy plant blooming on my birthday.
I thought it didn't make it through the late ice storm we had,
but it's got two beautfiul red flowers on it now!

Another birthday, another year of life and many things to be thankful for. Every year I am a little surprised at how different a birthday is as an adult. I don't know why it's taking me such a long time to adapt to that difference from childhood. But it is better, especially when you have a best friend/spouse and a precious baby girl to spend it with. 28 years of life accomplished, and so many more to come!

Thursday, March 22

"Samoa" Cookies

A few months back I saw a great recipe at beautiful Real Sustenance blogGluten Free Samoa Cookies. (Grain/Egg/Corn/Soy/Dairy/Refined Sugar Free). Samoa cookies have always been my favorite, dating back to my year as a Junior Girl Scout. If you've ever read the label though, like me, you know that they are not very good for you. So I was very excited to find Brittany's recipe over at Real Sustenance, and saved it for a later date. Check out the recipe here.

I finally had the chance to make these cookies yesterday with a good friend. They weren't exactly like original Samoa, but they were EXCELLENT cookies, even compared with traditional cookies made with wheat flour and butter. We used spring themed cookie cutters - a flower, a tulip and butterfly. If I get the chance to make these again some day, I will just keep it simple with a circle cutter, because the shapes get covered by the blobs of caramel and you can't tell what they are underneath the delicious toppings. The shapes made it more festive though, so I'm still glad we did that.

The caramel is so delicious, the fact that you can't tell these are tulips, flowers and butterflies doesn't really matter!

First, I used Bob's Red Mill Gluten Free Shortbread mix to make the base cookies. It was one of the last grain items left in my kitchen, so it needed to be used up. This made my cookies gluten free but not grain free. However, they are free of soy, dairy and egg.
I made the shortbread cookies with substitutions for the ingredients called for on the recipe on the bag, which called for butter, water and an egg yolk.
I used the new Spectrum butter flavored palm shortening in place of butter or soybean oil shortening, and instead of egg yolk I mixed a heaping tablespoon of golden flax meal with 1/8 cup warm water, into a yolky-textured gel. I had to add water throughout mixing the dough, to get it to the right texture to roll out flat, but they turned out very well - if a bit hard. The golden flecks of flax meal in the white cookies looks pretty.

Once the shortbread cookies were cooled, I made the caramel. The original recipe had several options for each ingredient - what a blessing when you have dietary restrictions! I made it with the following:
  • 3/4 cup organic virgin coconut oil
  • 1 1/4 cup brown sugar (another item in the small "gotta get rid of this" section of my cupboard!)
  • 1/4 cup agave
  • half can of canned, preservative-free coconut milk (I LOVE Taste Nirvana!)


I was surprised at how long it took to get the caramel past 200 degrees; it was a stubborn pot that didn't want to boil! But finally after about 30 minutes, the candy thermometer was creeping up and we had our caramel. It was delicious! I think it's pretty neat that you can make caramel dairy-free, and I want to make it again for a special occasion to top coconut ice cream.

For the chocolate topping, we used Enjoy Life allergen-free mini chocolate chips (those things are AWESOME!) and my unsweetened coconut flakes were organic, small shreds from the bulk section of Whole Foods that we toasted on parchment paper in the oven for about 5 minutes

A tulip


It was definitely worth it to finally try out this recipe. I would love to repeat it every year around Girl Scout Cookie time, so I feel less left out. It's good to treat yourself once in a while :)
Happy Spring! Are you as thrilled as I am that it's finally here?!


Thursday, March 8

A Very Hypoallergenic Afternoon :)

Recently, my husband and I received the gift of an afternoon out together, just the two of us. And how did we choose to spend it? We were out of town, and took the opportunity to visit some places we don't have at home: first, a stop at a gluten-free, vegan bakery for coffee and a treat, and then: wandering the aisles of Whole Foods for several hours, filling our cart with beautiful and hard to find where we live whole foods. (No pun intended!) Can you tell by our choice of date locales, that we love food AND eating this way?

The afternoon was so ... wonderful!

At the bakery, it took me a good ten minutes to decide what to get, as I told the clerk "I'm so overwhelmed that I can eat all of these things; I can't decide!" That was a wonderful problem to have :)
I finally decided upon a Linzer cookie, because it had more hazelnut meal flour than anything else - the closest to grain-free that I could get. I ordered a gingerbread hemp milk latte to go along with my cookie. Hubs ordered an almond milk latte and a berry scone. We sat at the bar in the window and thoroughly enjoyed our desserts and coffee. Oh, was the Linzer cookie a delight. Crispy crunchy sugary melt-in-your-mouth bites, and sweet sticky raspberry jam. Recreating that cookie is now on my ever-growing list of food to-do's!


I am so grateful for people who get inspired - either by personal necessity or for the people they love - and start businesses catering to us Celiacs and allergic. They possibly don't know how much it means to be able to enjoy an afternoon in a coffee shop or bakery with no worries of having a reaction to the experience. That's something I took for granted until I couldn't do it anymore!

My favorite picks from Whole Foods are:

  • two jars of ghee (casein- and lactose-free clarified butter, made from organic cow's milk). I've heard that many dairy-allergics like me can safely have ghee. I have high hopes I'll be in that category too!
  • two types of bulk dried coconut - organic medium shred, and conventional unsulphured wide chip. I love sprinkling these on my sweet potatoes and orange winter squashes
  • organic chicken livers - Hubs gave me the O.K. to grind these up and add to a meatloaf, so he won't know they are in it but will get the nutritional benefits. Can't wait to try that!
What a fun and totally hypoallergenic afternoon it was. One for the happy-memories bank in my head :)

Wednesday, February 15

Apple Cider Baked Doughnuts!

This morning was one of those special ones - I got up and the sun was shining, my body wasn't flaring, and I was ready to take on something new! (Don't you love that?) So, I baked some doughnuts. And oh my goodness, are they good. Stay with me here...

A few days ago I came across a recipe for Apple Cider Paleo Doughnuts over at Paleo Spirit. With a few modifications, I soon had six gluten-free, dairy-free, grain-free, egg-free, soy-free, Paleo, (vegan,) Apple Cider doughnuts on my counter top.

Now there's only one. And I'm trying to save it for my hubby. But I don't know if I will make it!

What a wonderful sight!


Apple Cider Baked Doughnuts
adapted from Paleo Spirit

What you need:

1/2 cup coconut flour
1 teaspoon cinnamon
1/2 teaspoon baking soda
pinch of fine sea salt
2 tablespoons maple syrup
2 tablespoons melted coconut oil
2/3 cup warmed apple cider (I used a locally produced unsweetened, unfiltered, fresh pressed apple juice)

For the sweet sprinkle topping:
1/4 cup sucanat
1 tablespoon cinnamon

What to do:

Preheat oven to 350 degrees F.
Prepare your doughnut pan. I used canola oil spray, but I don't condone this for regular use! Next time I'm going to grease the wells with coconut oil and see how that works.

First, make your egg substitute. Put 3 tablespoons of flax meal in a bowl, cover with 1/3 cup warm to hot water. Whisk with a fork and let sit to gel.
Another option is to use homemade cinnamon applesauce* - it would add the binding capabilities of egg, plus more apple and cinnamon flavor! (I'm doing this next time!)

Next, get out two mixing bowls. In one bowl, use a fork to mix together the coconut flour, cinnamon, baking soda and sea salt. In the other bowl, stir together maple syrup, melted coconut oil, and egg substitute. Add the dry ingredients to the liquids and fold together. Pour in the warm apple cider and mix well.

Spoon dough into the doughnut wells, enough to be level with the pan surface. I used a full size doughnut pan with 6 wells, and the amount of dough was exactly perfect to fill each one to the top. Put pan into preheated oven. After 15 minutes have passed, check on the doughnuts. They will be soft to the touch even when done, but when they are ready, the edges will be browned and when you tap the dough with your finger, no batter will come off. My doughnuts were ready after 20 minutes of bake time.

Let sit to cool and "firm up" for a bit, 10 to 20 minutes. I had to feed my little one, and when I returned after 20 minutes the doughnuts were spongey-soft but firm enough that most of them came out of the pan in one piece when I turned it over onto a cutting board. 

For the finishing touch, use a silicone/pastry brush to moisten the doughnut tops and sides with melted coconut oil, and sprinkle on a mixture of sucanat (or coconut sugar, or whatever pretty crystallized sweetener you like) and cinnamon.

These doughnuts are very soft, almost spongey, and remained that way all day. Absolutely no problems with coconut flour-drying out issues here! They have a moist coffee-cake-like texture, but they are fragile; don't expect to pick one up and eat it like a "crap-filled Hostess" doughnut (ok, that quote was from my husband just now). My taste tester said they remind her of old fashioned Dunkin Donuts - the cake style ones that had cinnamon sugar topping. If you are comparing these to that kind, I'd say they are as good if not better! I’ll play around with it some more to see if I can get them firmer (maybe less liquid?), but the taste is in need of NO upgrades! Another day, another reason to be thankful for the food we're meant to eat! :)

Monday, August 15

Gluten-Free Blackberry Crisp

I haven't been cooking or baking much (actually, almost NEVER) during this pregnancy, which is why it has been months since I posted a recipe here. I actually baked something over the weekend, and it felt like a betrayal to not post about it! So, here you go:

We feel blessed to have an abundance of a noxious/invasive weed in our backyard and alleyway. Blessed by weeds, you say? Well yes, because for about two or three weeks each summer, these weeds happen to have huge, juicy, sweet blackberries hanging off their pokey vines!


It's blackberry season, and we have finally had enough sun and heat to ripen a fair amount of berries. It has been on my mental radar almost every day to get outside and check the blackberries, so we're sure not to miss the crop. Last year we waited and waited for them to ripen, and they finally did over a few days when we were busy - and then it rained, and by the time we got outside to pick some berries, every last one was spoiled. So this year it's been a priority. On Saturday my mom and I got out there in the afternoon sun and picked two overflowing containers full. Yes!

We came in with about nine cups. Oh, here's my berry picking tip for you. See, I grew up berry-picking into plastic four-cup measuring cups, and still keep up the tradition. They work great - they're unbreakable if dropped, and it's easy to know just by a quick glance when you've got enough for a pie (usually four cups are needed)! I've been in the mood for baked goods and baking, which is a change from the past nine months. I really want to bake a blackberry pie before the summer is over, but I haven't the energy right now to play around with homemade gluten-free crust. So I thought, maybe a cobbler/crisp type of concoction would be yummy and much easier?
After we all had dinner (one of my favorite dishes that I'll have to share with you sometime: Soy Sauce Chicken), I searched online and quickly found a recipe for Gluten-Free Blackberry Crisp. With help from Hubs and Mom, we threw it together in ten minutes, and put it in the oven. [Sidenote: Isn't the worst part of baking something with berries just waiting for it to cool after you pull it out of the oven?] Well, we made it through the cooling off period, and each of us enjoyed a little bowl of Tillamook French Vanilla Ice Cream with warm GF Blackberry Crisp on top. YUM!!!

Here's the recipe. Credit for the original recipe goes to GlutenFreeDreaming.com, and the modifications are my own.


Gluten-Free Blackberry Crisp

Preheat oven to 375 degrees. Grease a 13x9 inch pan with coconut oil.

In a medium bowl, mix 8 cups blackberries, 1/2 cup Sucanat or raw/turbinado sugar, 1/3 cup tapioca or potato starch, a sprinkle of cinnamon to taste, and 2 TB lemon juice. You don't have to mash the berries, but some will get that way as you stir -especially if they are very ripe! Pour into the prepared baking dish.

In another medium bowl, mix 1 1/2 cup gluten-free oats, 3/4 cup packed brown sugar, 1/4 cup tapioca or potato starch, 1/4 cup brown rice flour, and a sprinkle of cinnamon and nutmeg to taste (I used approximately 1/2 tsp cinnamon and 1/4 tsp nutmeg). Then add 1/2 cup softened butter, cutting in with a pastry blender or using your clean hands, until mixture is blended and resembles coarse crumbs. Sprinkle evenly over the top of the blackberries waiting in baking pan.

Bake in 375 degree oven for 35 minutes until topping is golden brown and berries are bubbling, and if you want to crisp the topping more, broil (on LOW setting, just in case you forget about it!) for a few minutes. Let cool for at least twenty minutes, using a fan if you're desperate to enjoy dessert and can't wait long. Spoon over vanilla ice cream for a special treat! Enjoy.

Now if I can just get a GF pie crust together, there are some huge ripe berries outside just begging to be put in a pie... ;)

Saturday, April 30

GF Lemon Cornmeal Cake

I made this delicious lemon cornmeal bundt cake for our open house two years ago, and it was very good. I found the recipe in a spring issue of Women's Day, and it fit in perfectly with the chicken taco buffet and cilantro lime rice we served. I didn't have any food allergies then (weird I know) and didn't think anything of the wheat flour, butter and eggs in it.

Well, I remembered this cake last week, tracked down the recipe, and decided to see if it could be pulled off in a gluten free version. While using Google to find the original recipe from Women's Day, I also happily stumbled upon someone's gluten free suggestion for the same recipe (she's got gorgeous pictures of the finished bundt cake there as well)!

I am signed up to bring dessert to our small group tomorrow, and I think the lemon and cornmeal flavors of this cake will fit nicely with the BBQ chicken lunch our hosts are cooking. And imagine, I can have a piece with everyone else when it's time for dessert! It's the simple things that I appreciate...
We don't normally keep sugar in the house, but I had some leftover from baking gluten-free sugar cookies with a friend. I had to buy a little bit more so I could bake both a test cake for home and a cake for small group. I hate buying sugar -I'd go so far as to say it makes me feel dirty to do it! But I tell myself that ONCE IN A WHILE is okay. Now is not a good time for experimenting with stevia, maple syrup or honey to try and get the right flavor for this cake and glaze.

As with all gluten free recipes, this needed testing before I share it with gluten-indulgent friends. So this morning I halved the recipe and baked an eight inch round. I had no issues with it at all, it baked up perfectly in thirty minutes! I just tried a piece, and it's delicious! I'm sure the butter, eggs and sugar have a lot to do with that. ;) (At least it's gluten free!) It's soft, a little crumbly, tangy and sweet. The glaze hardens and makes a nice sugary crunch. A must-have for a spring or summer tea party, baby shower or BBQ. Put it in a glass cake dome or on a lovely pedestal. Perfection!

Here's the recipe for an eight inch round. Double it and proceed with care to attempt the full Bundt cake - I don't know how it would turn out in a gluten free form.

Gluten Free Lemon Cornmeal Cake
Grease an eight-inch cake pan with coconut oil and dust with rice flour.
Preheat oven to 325 degrees.

In a medium bowl, whisk together:
1 cup rice flour
1/4 cup corn starch
1/2 tsp xanthan gum

Add:
1/4 cup cornmeal
1 tsp baking powder
1/4 tsp baking soda
1/4 tsp salt (or less if you watch your sodium intake- I used just a sprinkle)

Whisk together well and set aside.

In the bowl of your standing mixer, beat together the following on medium speed until light and fluffy:
1 stick softened unsalted butter
Between 3/4 and 1 cup sugar
Zest of 1 lemon
Juice of 1 lemon

Add 2 omega-3 organic eggs and blend together.
With mixer on low, alternately beat in dry ingredients and 1/2 cup plain nonfat yogurt which you have stirred smooth. Mix until batter is smooth, but do not overmix (never overmix gluten-free batters).
Batter will be thick. Scrape into prepared cake pan and smooth with spatula/spoon.

Bake for thirty minutes, until toothpick inserted in center comes out clean. Place pan on wire rack to cool.

After five minutes, remove cake from pan and place atop a square of parchment paper. To make the glaze, whisk together 1/2 cup sugar and juice of 1 lemon in a small bowl. Sugar won't dissolve completely. Pour/brush glaze over the hot cake until much of it is absorbed.

Let cool and rest for several hours, then enjoy! Serve in thin slices.
To keep overnight or longer, make sure cake is covered well. It tends to dry out quickly.

---------------------------------------------
Our camera is not working right now. We are hoping to be gifted a new one before Baby Girl arrives, because pictures of our newborn will be kind of a necessity! But I took a few pics with my phone, just for fun.

The cake, ready to go in the oven - the batter is quite thick as the recipe states:

Hot out of the oven before glazing:

Glazed and cooled and missing a piece (now it's missing two!):

Thursday, March 3

Pumpkin Pudding Bars (gluten-free, vegan)

Oooh, yes please! This Pumpkin delight from Stephanie's Hope for Healing blog looks too good to pass up! I only have canned Libby Pumpkin right now, but that may have to do. I love the use of pumpkin all year round, because it's way too nutritious and delicious to limit to a short fall cooking and baking season :)

Pumpkin Pudding Bars (gluten-free, vegan)

Friday, February 4

Molasses Cookies!

Well, after my pining for pudding was satisfied with many bowls of chocolate mousse-y goodness, another sweet snack took over my thought life: Molasses Cookies. Haven't had one in a LONG time, because, while I may have my cheat moments/days when the food is in front of me, I don't go out and deliberately purchase foods that have wheat/dairy/soy/eggs/etc. So, I had found and printed this recipe for (GF and Vegan!) Soft Molasses Cookies several months ago, and I've been pulling out my recipe binder staring at it off and on for the past two weeks. Finally last night I got out my beloved red KitchenAid and we made some cookies! These are DELICIOUS. Soft, chewy, molasses-y, sweet. YUM!!!


Here is the recipe, verbatim from The Whole Life Nutrition Kitchen. This makes the second or third recipe I've tried from their blog, and Hubs and I both LOVED. Keep up the good work over there at NourishingMeals.com!

2 cups sorghum flour
½ cup tapioca flour 
1 ½ teaspoons baking soda 
1 ½ teaspoons xanthan gum
½ teaspoon sea salt
1 teaspoon ground cinnamon 
2 teaspoons ground ginger
¾ cup organic palm shortening 
1 cup Sucanat, coconut sugar, or brown sugar 
½ cup blackstrap molasses 
¼ cup unsweetened applesauce
2 teaspoons vanilla
2 tablespoons ground flax seeds

To start, make sure all of your ingredients are at room temperature; especially your applesauce.

In a medium-sized mixing bowl, stir together the sorghum flour, tapioca flour, baking soda, xanthan gum, sea salt, cinnamon, and ginger. 

In a separate mixing bowl, beat the palm shortening, sugar, and molasses together with an electric mixer. Add the applesauce, vanilla, and ground flax seeds; beat for another 60 seconds. 

Add the dry ingredients to the wet and beat together. Continue to beat for another minute or until the ingredients are well-combined and the dough thickens.

Cover bowl with a plate and chill dough in the refrigerator for at least 1 hour (or place dough in a sealed glass container for longer chilling). 

Preheat oven to 350 degrees F and grease a large cookie sheet. 

Remove bowl from refrigerator and form dough into little balls with the palms of your hands. Place each ball on the greased cookie sheet spaced out by about 2 inches.

Bake for approximately 12 to 15 minutes (shorter for smaller cookies, longer for larger cookies). Watch carefully as the cookies can burn easily. Transfer cookies to a wire rack to cool. 

Just a few notes: 
  • I was out of sorghum flour, so I used 2 1/2 cups GF flour blend that included sorghum, millet, and tapioca flours instead. 
  • The blend contains xanthan gum and baking soda as well, so I cut the recipe amounts in half.
  • I have no coconut sugar or Sucanut ((yet!) so I used brown sugar, and DARK molasses.
  • Chilling the dough definitely makes for a nicer time rolling the cookies with warm palms, so definitely follow the recommendation in the recipe. I chilled the dough for about 90 minutes.


Wednesday, January 12

Snow and Baking

I spent about two hours in the kitchen tonight preparing dinner and then eating at the bar and doing some homework. I looked out the window finally, after cleaning up, and the yard and street were covered in a blanket of white! Snow fell for at least four hours tonight - just beautiful! I sat down on the couch for my weekly dose of What Not to Wear and both cats practically leaped into my lap with jubilance that I was finally seated with a blanket. But my kitchen, oven, four ripe bananas and a recipe I've been wanting to try kept calling to me, and I had to give in and leave the kitties for a later snuggle. I made this Banana Nut Bread, and all I can say is that Stephanie is right -this recipe knocks your socks off and instantly becomes one that you'll turn to again and again. I'm even planning to make a loaf of this for my father-in-law, who misses my old tried-and-true, wheat and butter-filled banana bread that I used to treat him with occasionally. I don't think he'll be able to tell the two apart! Definitely try this recipe, it is divine.


I made muffins (a faster, easier breakfast/snack option than bread which needs slicing and plates). I adjusted the baking time to 15 minutes per batch of twelve. The recipe made twenty-two muffins in all. Here's a quick photo I snapped, just to prove to ya that I made 'em. I've already eaten two muffins, and I could eat two more. So I went proactive and froze most of them; this way they'll last longer than, well, one day :)

Wednesday, January 5

Easy GF Vegan Apple Bread!

There is less and less food around these parts, as we consume more and more of what we have and payday is still a few days away. This morning I was just not satisfied by my brown rice hot cereal with semi-thawed strawberries and leftover canned coconut milk, but there was not much else to choose from. After opening the refrigerator for the third time, I finally noticed I still had a few Jona Gold (aka beautiful!) apples from about a month ago (don't judge me!). I had made a point to buy apples for a quick bread recipe, and after debating for a few minutes, I decided to suck it up and bake! I'm glad I finally have enough of a supply of alternative baking ingredients that I can pretty much bake something on a whim - it's a nice feeling!

So, this recipe is kind of special because it was one of the very first to go into my cherished Recipe Binder. We didn't have internet access for quite some time, so once it was hooked up in early autumn I was online almost every day looking at the food blogs, searching for recipes and tips for people like me (allergic to dairy, egg, soy and wheat). She Let Them Eat Cake was the first blog I found that matched my allergies almost exactly, and it was so exciting! I even called my husband at work to tell him that I found a place where I could bake and cook almost anything that was posted! I printed out this Apple Bread recipe and filed it away, then early autumn (apple season) turned into late autumn and pumpkin took over my kitchen. Then it was Christmas, and other flavors and ingredients took precedence. January seems like a good time to find those passed-over recipes and try them out, so here we are :)
It just came out of the oven, and It. Is. GOOD! I love the texture: a crisp, sugary crunch on the top (brushing it with melted coconut oil helps with that) and moist, gooey cinnamon apple goodness inside. Perfection!

It needed about 10 minutes more than the recipe called for. Perhaps because of my flour-blend sub.
I cut out a piece right away, I couldn't wait!
*Substitutions: I didn't have arrowroot flour on hand and I am not in the mood to toast and grind quinoa for flour (another time!) so I replaced the flour mix that she uses in this bread with a different gluten-free mix containing sorghum, tapioca and millet flours. Also, I didn't have coconut sugar, and although it pained me to do so (almost as much as it pained me to buy it last month, even though there's no way to make sugar cookies without it!) I used organic cane sugar instead.

This is what happens when you don't let it cool first... but it doesn't affect the taste!